ProcessPlot allows you to create new processes step-by-step, tailoring them to your team’s needs. Below is a guide on how to create a process using the platform on the Process Creation page (https://app.processplot.com/wizard/tasks/).
Step 1: Process Details #
On the first screen, you’ll be prompted to fill in the details for your process in ProcessPlot:

- Process Name: Enter a clear and descriptive name for the process.
- Project Code: Automatically assigned unique identifier to distinguish this process (you can also add a code yourself).
- Template: Choose from the available templates to base your process on, or start from scratch.
- Add Tasks: Select relevant tasks from the available options to include in your process (if using a template). You can:
- Click on task tiles to include them
- Use the “+” icon to add custom tasks if needed
When ready, click Next to proceed.
Step 2: Assign Teams and Tools #
In this step, you define the teams and tools involved in your process:
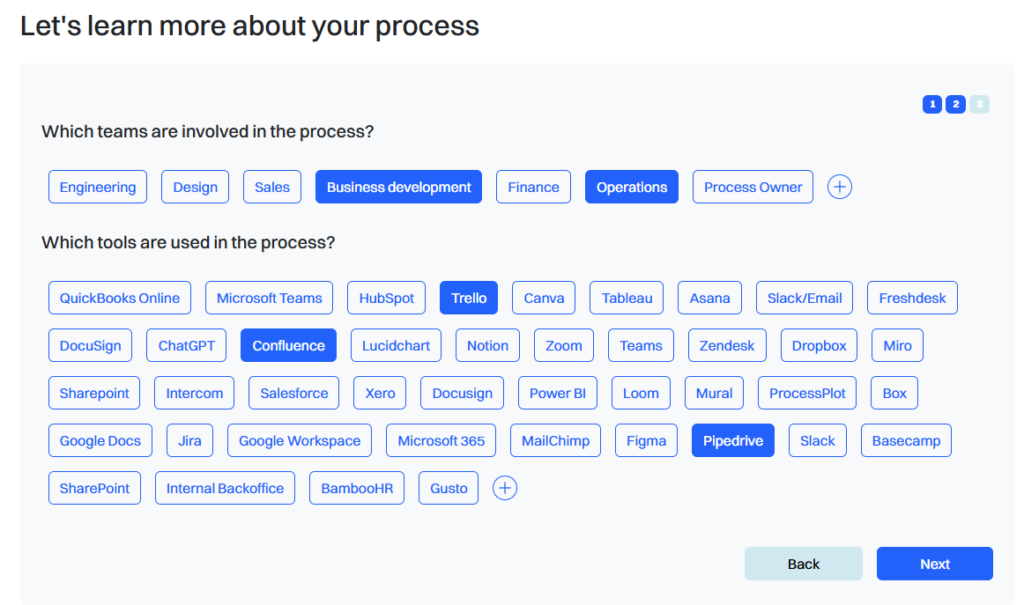
- Teams: Select which teams will be involved in executing the process (e.g., Legal, Support). You can also add new teams by clicking the “+” icon.
- Tools: Assign the tools that will be used during the process (e.g., Jira, Dropbox). Select from the available options or use the “+” icon to add custom tools.
Once teams and tools are assigned, click Next.
Step 3: Arrange Tasks #
In the final step of process creation:
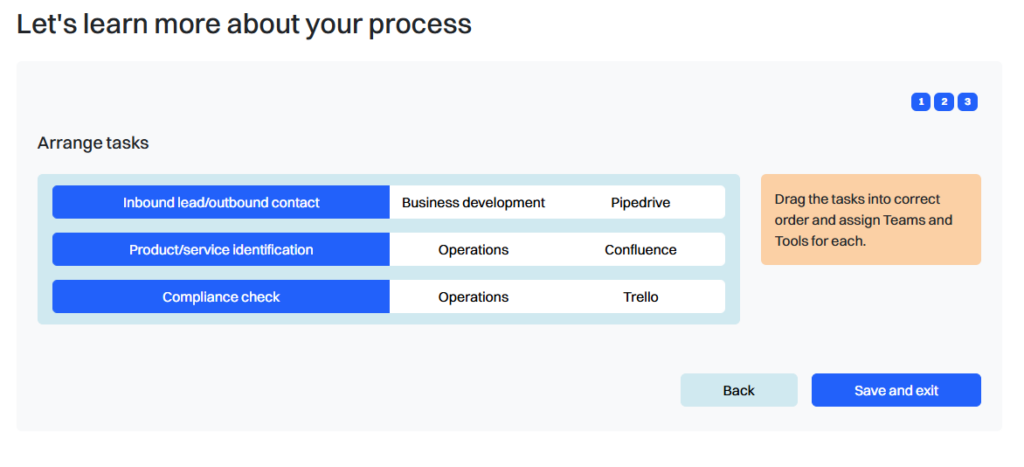
- Drag and Drop Tasks: Reorder the tasks into the correct sequence for your process workflow.
- Assign Teams and Tools: Specify which team is responsible for each task and which tool they will use.
Once the tasks are arranged and all details assigned, click Save and Exit to finalize the process.
Process Draft Mode #
After clicking Save and Exit, the new process will be created in Draft Mode in ProcessPlot. You can return to it later to make further edits or complete and publish it.


